
Enabling ThinPrint logging helps you to troubleshoot issues with ThinPrint. ThinPrint logging can be enabled on VDI Desktop as well as on Horizon View client system. However, implement this procedure if ThinPrint is being used in environment.
Enabling TPAutoConnect and ThinPrint logging on the VMware View Desktop machine:

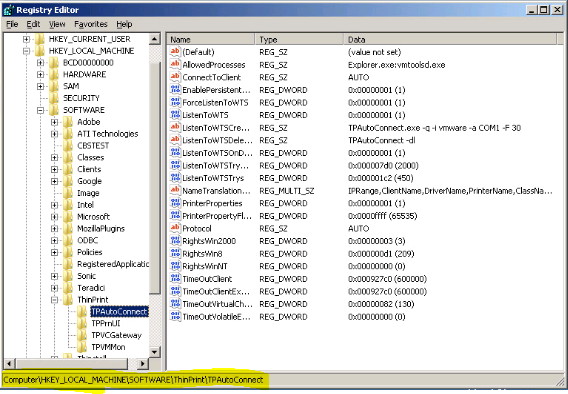


- Start regedit.exe from command prompt or Windows Run.
- Navigate to the HKLM\SOFTWARE\ThinPrint\TPAutoConnect key.
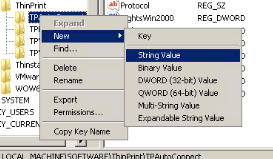
- Create a new String value and name it DebugFile.
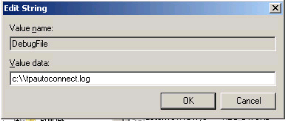
- Modify DebugFile and set its Value data to C:\\tpautoconnect.log
- Note: Ensure that you include the two backslashes so that the log file is created at the root of the C:\ drive.
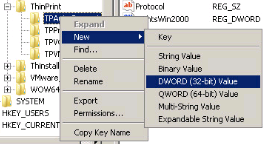
- Create a new DWORD value and name it DebugLevel.
- Modify DebugLevel and set its Value data to 000000ff.
- Navigate to the HKLM\SOFTWARE\ThinPrint\TPVMMon key.
- Create a new String value and name it DebugFile. Modify DebugFile and set its Value data to C:\\thinprint.log.
- Create a new DWORD value and name it DebugLevel. Modify DebugLevel and set its Value data to 000000ff.
- Create a new DWORD value and name it DebugMode. Modify DebugMode and set its Value data to 00000003.
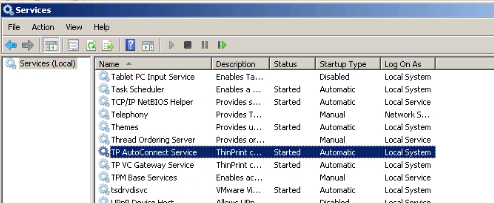
- Restart the TP AutoConnection Service for the changes to take effect.
- Verify that log is being created.
Similar to above steps, ThinPrint logging can be enabled on Horizon View client machine as well. Follow below instructions to do the same.
- Navigate to the HKLM\SOFTWARE\ThinPrint\Client key in Windows registry editor.
- Create a new String value and name it DebugFile.
- Modify DebugFile and set its Value data to C:\\thinprintclient.log.
- Create a new DWORD value and name it DebugLevel.
- Modify DebugLevel and set its Value data to 000000ff.
- Create a new DWORD value and name it DebugMode.
- Modify DebugMode and set its Value data to 00000003.
- Navigate to the HKLM\SOFTWARE\ThinPrint\TPViewture key.
- Create a new String value and name it DebugFile.
- Modify DebugFile and set its Value data to C:\\tpviewture.log.
- Create a new DWORD value and name it DebugLevel.
- Modify DebugLevel and set its Value data to 000000ff.
- Reboot the View Client system for the changes to take effect.


Leave a comment